Host a blog for free using GitHub Pages

GitHub Pages, AWS and blogging with Jekyll
I have been writing blogs on and off for a few years, with mixed reviews. My tool of choice has been Medium - it is free to use, the editor is nice, and there is a great community of writers.
Why would anyone want to move? Well, for me, it is a double-edged sword. I can write OK content, and occasionally I would get picked up by a publication which feels really nice - you get all the views and way more claps than you would if you were only sharing your ideas on the socials. Give me that dopamine hit. But, on the other hand, sometimes those articles become paywalled (after your free viewership is up). I get that Medium is a business, after all.
Anyway. Personal branding is a thing; I want to be more active, and buying my own domain and hosting a blog might be a good way to do that.
Enough with the why - let’s get to the how.
GitHub pages
These are really cool. If you ever want a quick static website hosted, this is (I think) your best option. I have used S3 and Cloudfront before, but this just works - and you can control it all via git, which as nerds we tend to love.
I won’t go into too much detail here, you can read all about GitHub Pages Here. It is super easy to set up, so for example a repo at github.com/deanbaker/blog will be served at deanbaker.github.io/blog.
Jekyll
You can skip this step if you like and go straight to Minimal Mistakes
Jekyll is a Ruby based framework that allows you to “Transform your plain text into static websites and blogs.”. It also has full GitHub Pages support which makes it an even easier choice.
I am interested in writing my blogs in Markdown format. It’s easy to write quickly without using a mouse or toolbar for formatting, which is very fast once you get used to it. I also didn’t want to be writing any HTML or JSX or whatever, I want to keep it as simple as possible.
Getting started is easy. I pulled down dependencies and got a raw Jekyll blog running to play with pretty fast. But you want your blog to look a bit nicer than that, right? Jekyll is the foundation, you are looking for a theme that works for you.
Theming - Minimal Mistakes
Being about as basic and middle of the road you can be, I ended up liking the theme with the most stars from the jekyll-theme repo. Minimal Mistakes looks good, and you can do a fair bit of customisation to it.
Quick Start
Even better for the lazy developer, Minimal Mistakes provides a starter repo that you can fork into your own GitHub account. It doesn’t get much better than that folks. There are some sample blog posts in there to give you and idea of how you can create content.
Pull down the codebase and start it locally - with my local setup I had to add the webrick gem to get it started (I had to for the vanilla Jekyll install too).
bundle add webrick
Config
I like this project because it abstracts so much away from me, and I can just get started. Again, I won’t go into too much detail here because there is loads of content on the Minimal Mistakes website, but get in there and look at _config.yml. This is where you are going to add all of your personal details, look and feel settings, and things like GA tags.
Get it running on GitHub first
Ok - now we have a git repo with some default blog content - go ahead and get it running on Pages. Push your changes to your blog repo and follow the instructions here -GitHub Pages
You will now be able to see your website live on GitHub Pages - something like deanbaker.github.io/blog. Congrats!
Custom domain
Having deanbaker.github.io is pretty cool. But that isn’t so different from dean-baker.medium.com.
GoDaddy
I know this company hasn’t had the greatest run in terms of PR, but it was the company I used all those years ago to buy my first domain. Foolishly, I used it again for this project.
You can get the domain OK, and I had it all wired up to GHP. Using HTTP. What you can’t get (for free) is an SSL certificate. Now, I thought I could hook up Lets Encrypt and be done with it, but it turns out that would clash with GoDaddys business model of selling SSL Certs for a bunch of money.
You can get it working, but it isn’t automated, and you have to repeat the process every 60 days or something.
AWS
I am a long-time AWS user, so I did what I should have done first - buy a domain via AWS. I know I can transfer ownership of my GoDaddy domain, but you can’t do it within 60 days of purchase… And I am an impatient man.
Route 53
Go ahead and buy your domain and add the things the instructions tell you to add to your DNS records:
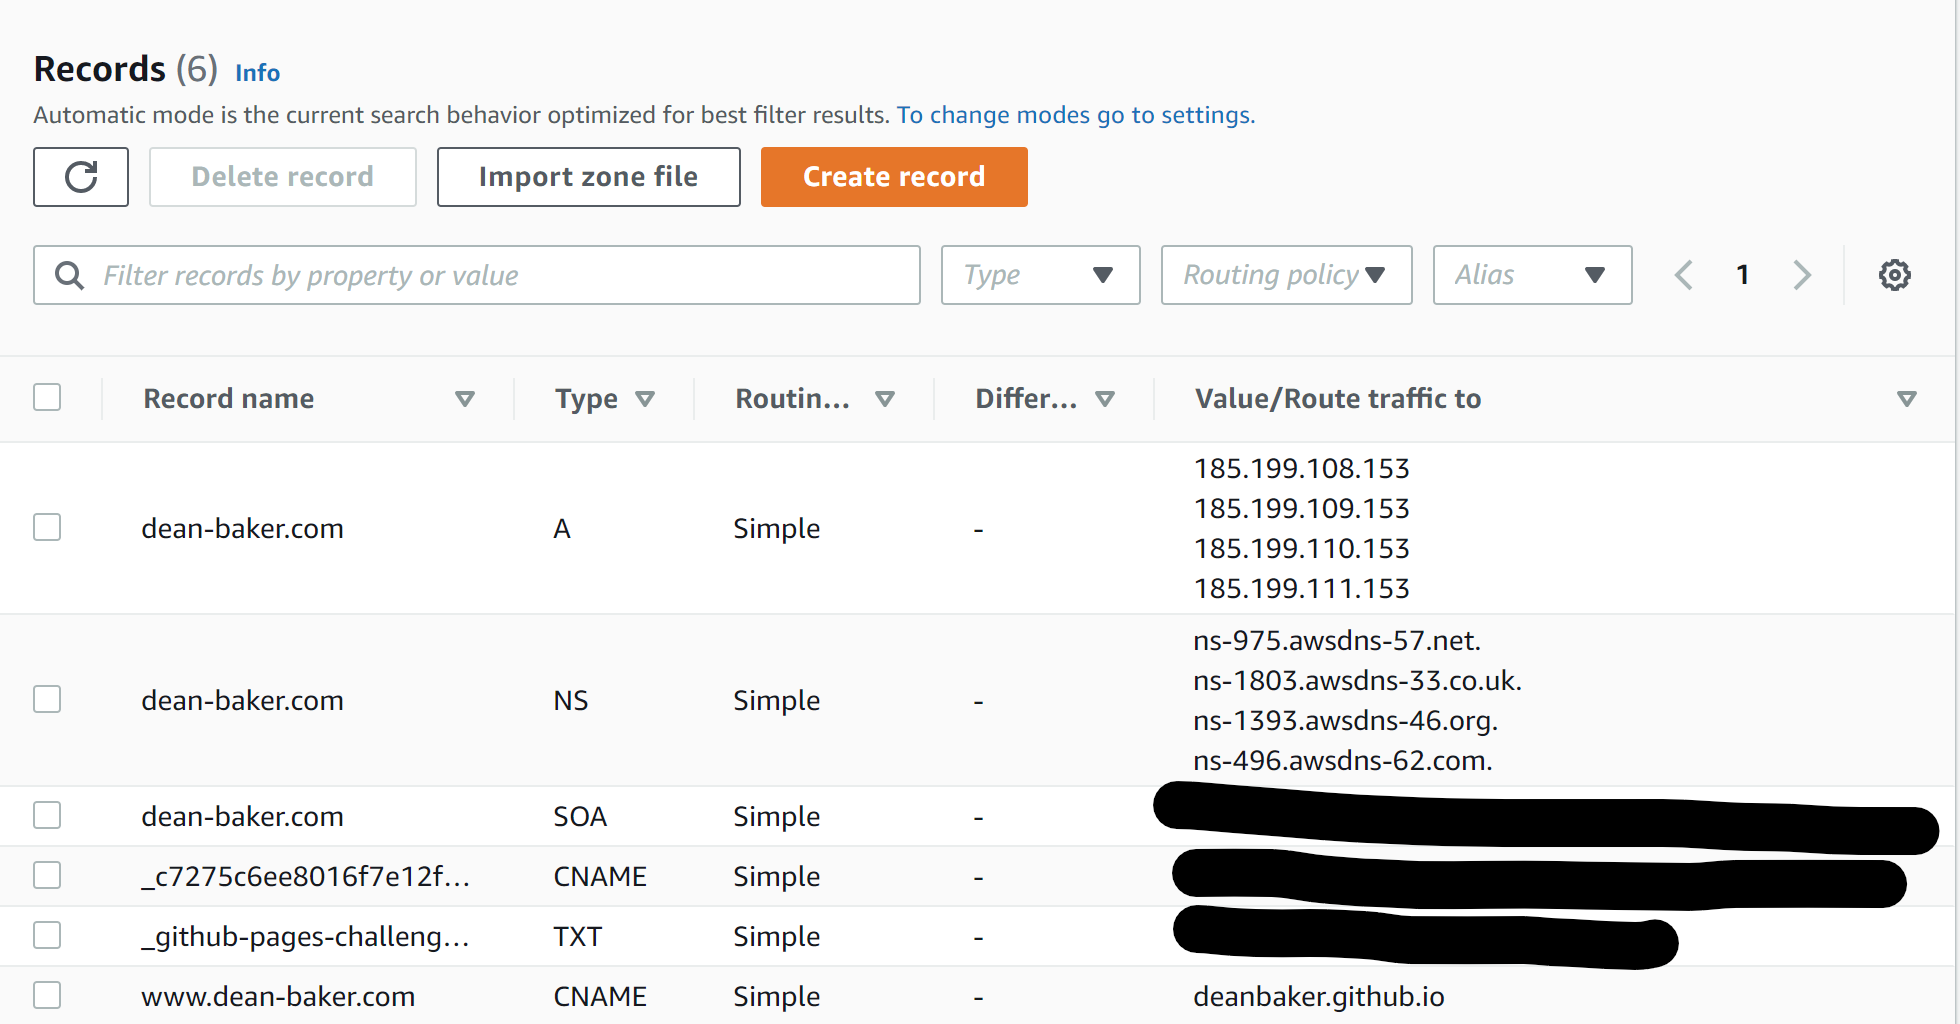
DNS can take time to propogate. Be patient and stop playing with it!
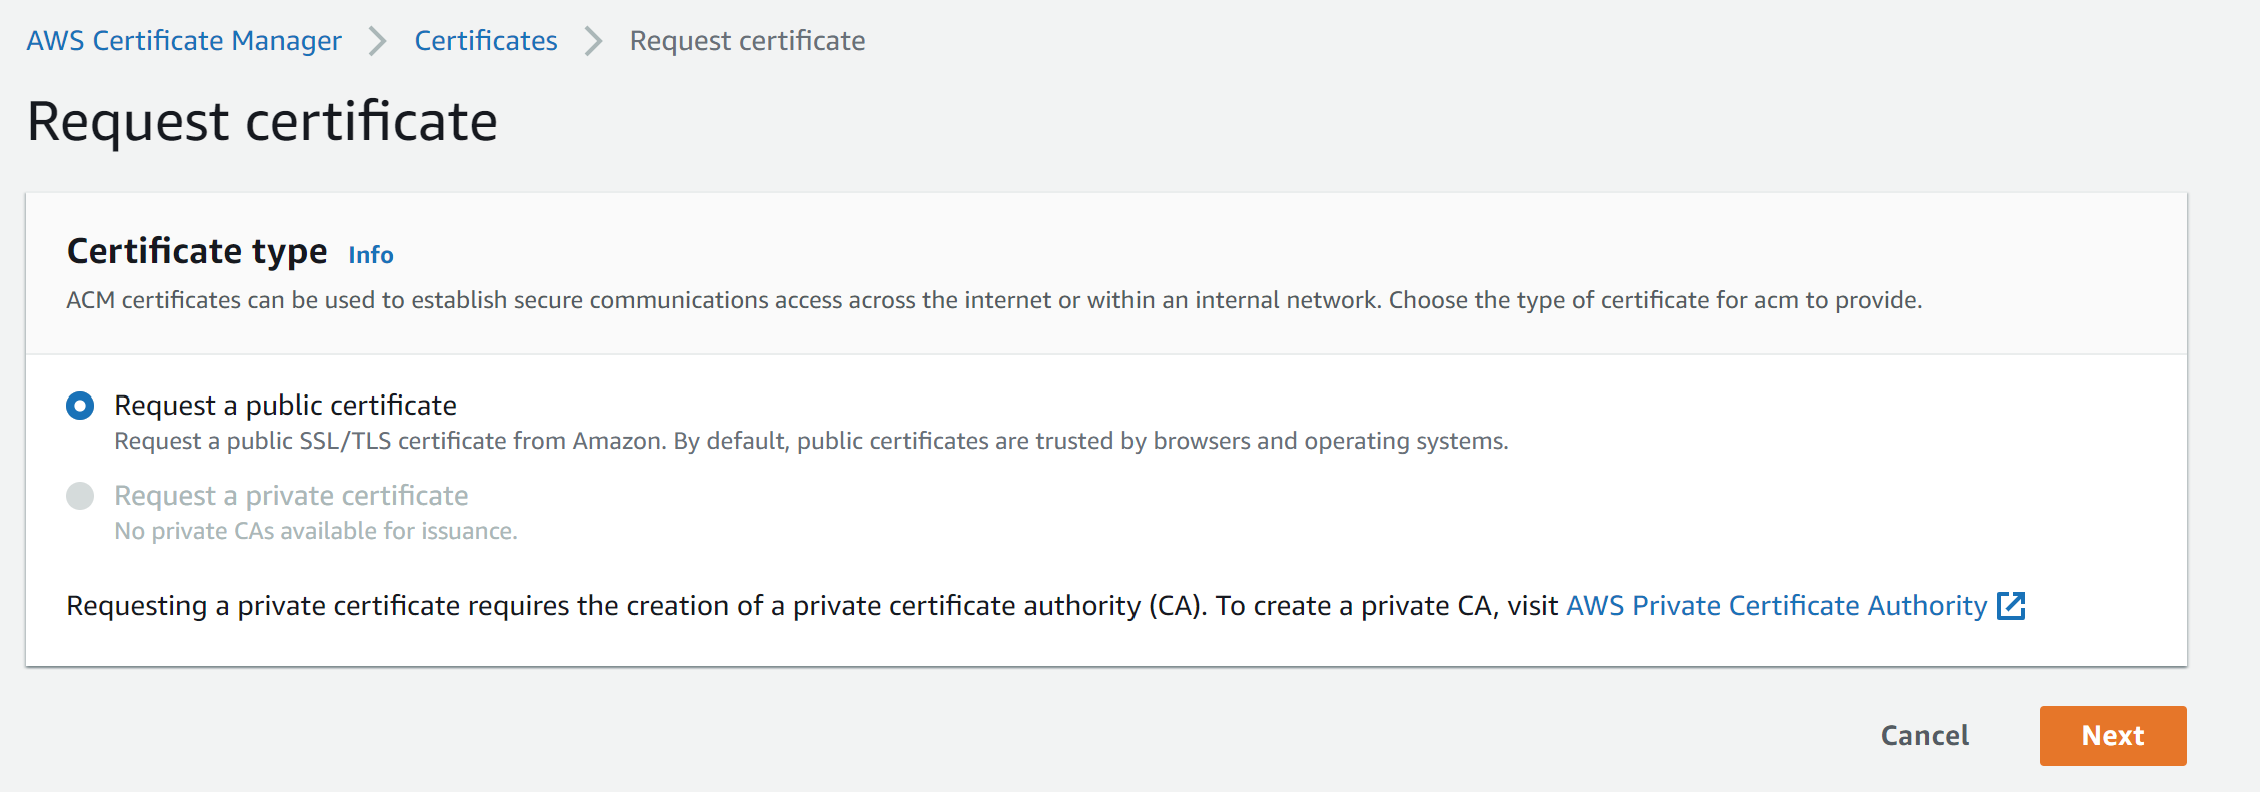
Certificate Manager
The reason I am here - to get that Certificate! Certificate Manager provides free SSL certs for us to use. It is easy to set up, and there is even a button to Create records in Route 53.
Go do that.
The final wiring
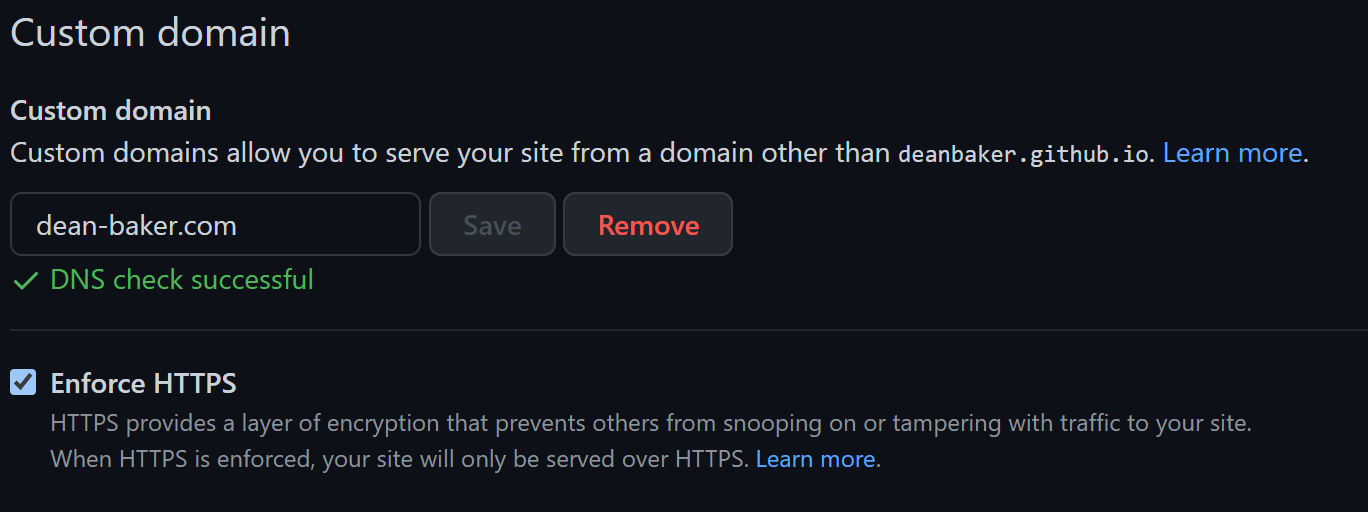
Ok. So now we have a blog running at <username>.github.io. We have a domain that can be accessed via SSL. We are ready to join the dots!
We have done most of the steps outlined in this GitHub howto. All that is left to do is enable your custom domain.
Under your repository name, click Settings -> Pages and enable your domain:
Resources I found handy
Check out the Jekyll docs for more info on how to get the most out of Jekyll. File all bugs/feature requests at Jekyll’s GitHub repo. If you have questions, you can ask them on Jekyll Talk.


Comments